


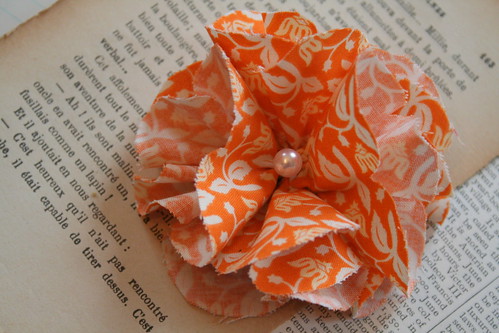
I am in the process of adding flowers and flower kits to my website and etsy page for purchasing, but I thought that it would be fun for you to see the process of the flower-making for those of you who would rather do it yourselves.
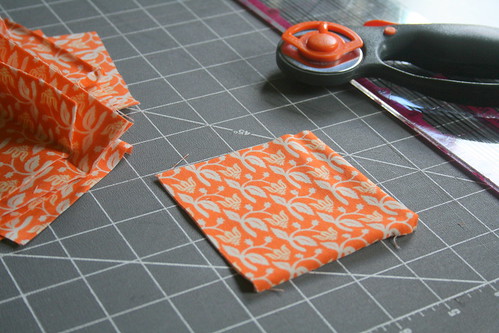
step #1: start with squares--the more squares, the fuller your flower will be. In this tutorial I am using 6 squares that measure 3 1/2 inches.
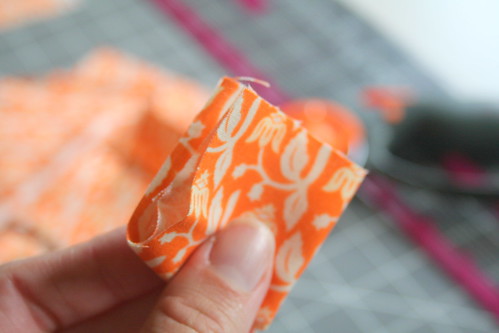
step #2: fold the square into quarters.
step #3: hold the folded end and cut the edge into a semi circle. It will look like an ice cream cone while it is folded.
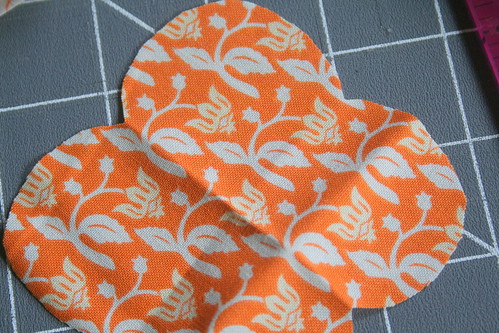
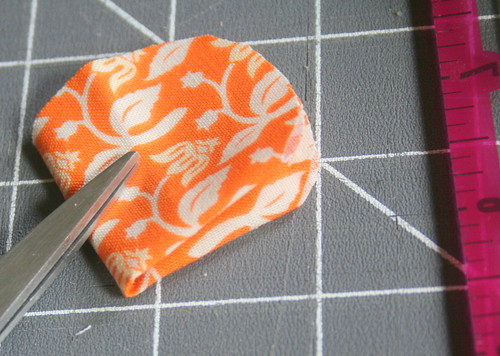
This is what it will look like when you unfold it...

step #4: hand sew a circle in the middle of your scalloped square. I used dark thread in this example so you could see it easily. It doesn't have to be perfect.
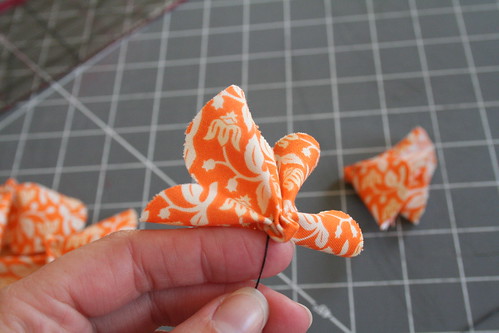
step #5: pull your sewing tight and it will bunch up. tie a knot to secure it.
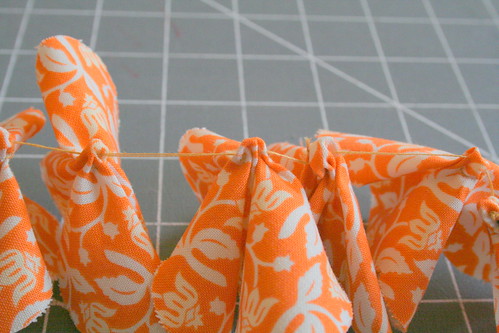
step #6: after doing this with all the pieces, sew them together by the little center bunchy parts:)

step #7: then pull it tight and it will start looking like a flower.

step #8: sew them all together and secure with a knot. You have your basic flower and you're ready to embellish it any way you choose!
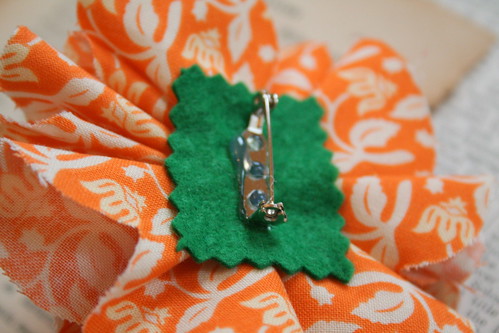
step #9: sew on button details and hot glue felt and a brooch pin on the back. I used to hand sew the felt and clasp on, but recently have found that hot glue saves lots of time and energy.
*Remember, go here or here to pre-order your aprons now!


15 comments:
I made this fabric birthday garland last week and have TONS of that shape left over so this will be perfect to use it up! by the way off to preorder an apron for my sister's bridal shower :)
OH, I like!!! Glad you're making time to be crafty!
Brittany...it is your cousin, Chelsea...I just created a blog this week. I found yours from Brooke's blog...I am sure you don't mind. You are the cutest. Your kids are getting so big. I wish I could see you sometime. I am glad that I created a blog, it is fun to stay in touch with people. You are so incredibly talented...it is ridiculous. Where did you come from? Just kidding!
i can't wait to try this out!
xoxo
Thank you for this! I used it to make an Anthropologie look a like necklace.
Thank you for this.
Is wonderfull work.
big hugs Karin
Hey! Very cool of you to share this. thanks for the detailed photos! Love the blog!
www.scrapbits.typepad.com
great tutorial - thank you! so cute i am visiting your visiting your blog from jessica link.
This is a wonderful tutorial. Thank you for sharing!
Ha! this is pretty much the exact same tutorial I have on my own blog, which I had forgotten all about - thanks for reminding me :)
I'm so glad I found your blog! This is exactly the kind of flower tutorial I was looking for. Thanks so much!
what a cute creation. thanks for the tutorial too :)
Great tutorial! We used it for our ladies' church group. The flowers turned out beautifully! Thanks for sharing.
WOOOOW!
amazing orange flower love it....
send gifts to pakistan
It's really appreciating article.I used to search for these sort of article always.Thanks for sharing your creative writing abilities.
Post a Comment